| One clean jar (3/4 to 1 litre in size) | |
| 1/2 cup (60g) of Rogers Foods Whole Grain Whole Wheat Flour or Rogers Foods Dark Rye Flour | |
| .... | |
| To Feed Your Starter Each Day (Days 3-7): | |
| ***1/2 cup (60g) of Rogers Foods Whole Grain Whole Wheat Flour or Rogers Foods Dark Rye Flour or Rogers Foods All Purpose Flour | |
| ... | |
| ***Whole wheat and rye flours provide more nutrients for your starter and ferment more actively. Working with rye flour makes starter maintenance easier than whole wheat. Rye flour also provides increased fiber and nutrients similar to whole wheat flour, but because of its lower gluten amount it's much easier to stir. |
| 1. | Day 1: Make the Starter |
| 2. | Combine 60 g (1⁄2 cup) of whole wheat flour and 60 g (1⁄4 cup) of warm water in a large, clean jar. |
| 3. | Mix until smooth until the consistency is very thick and pasty. If measuring by volume, add more water to thin out the texture if needed. Cover with plastic wrap or a lid, and let it rest in a warm spot for 24 hours. You can put your jar on a baking tray and put into the oven with the light on for warmth. |
| 4. | Day 2: Got Bubbles? |
| 5. | Have any small bubbles appeared on the surface yet? Bubbles indicate fermentation, which is a good sign. It is okay if you don’t see anything right away. It’s common for the bubbles to appear and dissolve overnight. You do not have to do anything else right now, just keep the starter in its warm spot for another 24 hours. |
| 6. | If you have any brown liquid on top or within the starter, this is called ‘hooch’ and typically means the starter needs a feeding. It’s often a stinky smell and this is normal. This is fine for day 2 but if it appears in the future, pour off the liquid and any starter it is in contact with. |
| 7. | Day 3: Time to Feed Your Starter |
| 8. | Bubbles or not, it’s time to feed your starter. |
| 9. | Discard half of your starter from the jar (you should have about 60 g left). Add 60 g (1⁄2 cup) flour and 60 g (1/4 cup) of warm water. Mix with a fork until smooth. |
| 10. | The texture should resemble thick pancake batter at this point. Add more water as needed. Cover and let rest in your warm spot for another 24 hours. |
| 11. | DAYS 4, 5, & 6: Continue Feeding! |
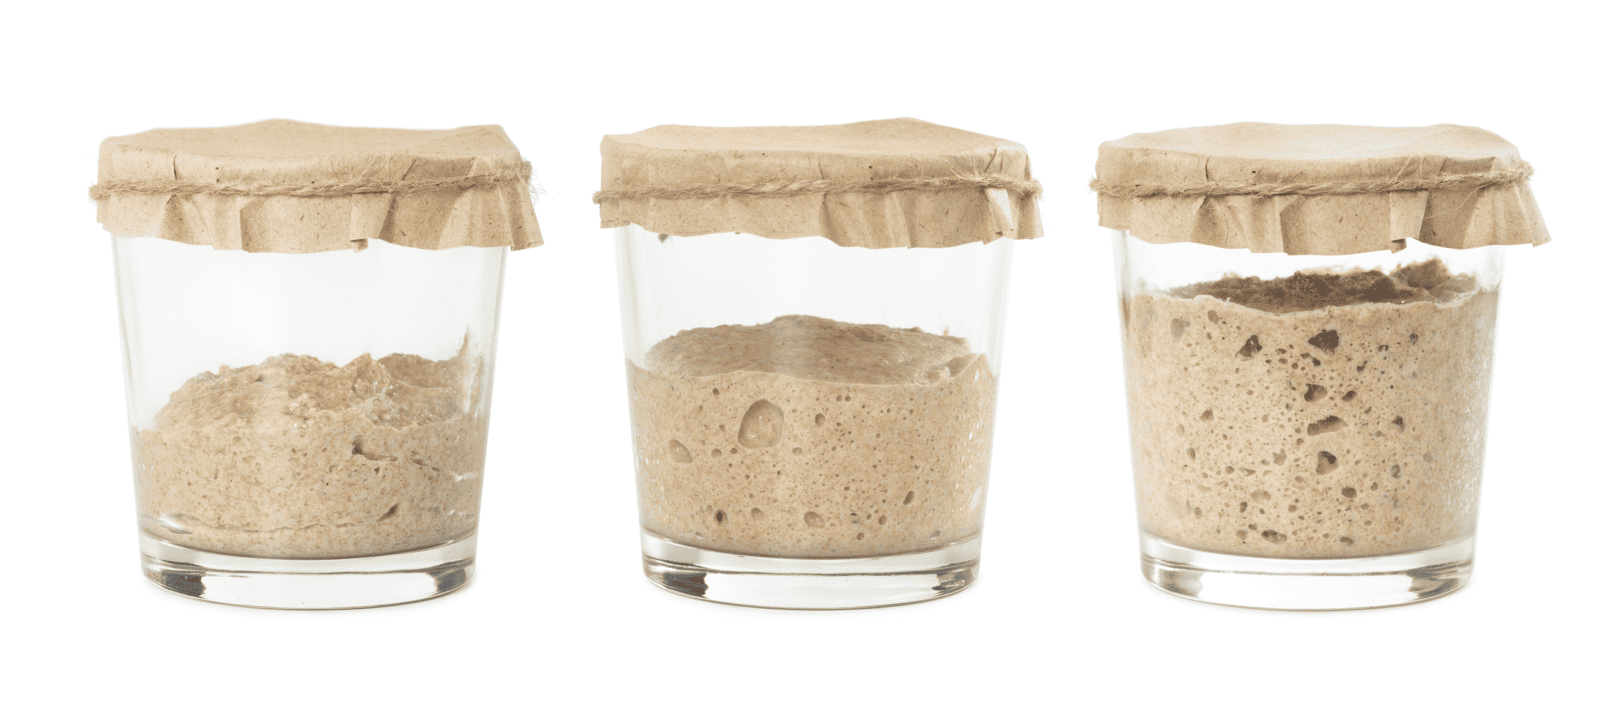
| 12. | Repeat the same feeding process as outlined on Day 3: Remove and discard half of the starter, and feed it with 60 g (1⁄2 cup) of flour and 60 g (1/4 cup) of warm water. As the yeast begins to develop, your starter will rise, and bubbles will form on the surface and throughout the culture. When the starter falls, it’s time to feed it again. You can measure the rise and fall of your starter with an elastic band or piece of tape. Use either to mark where your starter level is in the jar. |
| 13. | Day 7: The Final Stretch! |
| 14. | You will see plenty of bubbles in your starter and it should have almost doubled in size. The texture will be airy, fluffy, and smell pleasant. If this sounds like your starter, you are ready to go and should be transferred into a clean jar. |
| 15. | Now you are ready to make something with your sourdough starter! Try one of our recipes below. |
| 16. | How to Store Your Sourdough Starter |
| 17. | Once your starter is established, you have two storage options to consider. |
| 18. | At Room Temperature: If you bake often—let’s say a few times a week—store your starter at room temperature. This will speed up fermentation, making the starter bubbly, active, and ready to use faster. Room temperature starters should be fed one to two times a day, depending on how quickly they rise and fall. |
| 19. | In the Fridge: If you don’t bake that often, store your starter in the fridge covered with a lid. You’ll only need to feed it about once a week or so to maintain its strength when not in use. When you are ready to make dough, feed your starter at room temperature as needed, to wake it back up. Some people have starter that has been in their family for years! It will last indefinitely as long as you refresh it regularly. This is called heirloom starter. |
| 20. | Note: The overall process typically takes 7 days, if the temperature is warm enough. However, it can take up to 2 weeks or more for a starter to become established. Find a warm spot for your starter to rise and use warm water in your feedings (if necessary) to give the fermentation a boost. |


/rating_on.png)
Leave a Reply